 Luke Gearing
Using Markdown and Pandoc to Make RPG Documents for Free
This is a rough guide. If you do some googling you can get a lot more detailed information about any of the steps or components - this is focused on getting you started making stuff.
The output isn’t going to look good like a layout designer has done it. It will be readable, usable and can be very easy to use with various accessibility tools. Some example output when you turn stuff into a pdf.
You’ll need to install 3 items of software and do some very light console work - this is much easier than it sounds, and the guide will give you a step-by-step.
The guide assumes you’re using Windows. If you don’t, things should work the same, but you might need to do some extra research.
As a fun extra - this blogpost was written in markdown. Blot is not the only bloghost that uses markdown, but I really like it.
Software
You’ll want to install a text editor. Notepad works fine, but is playing on ‘hardmode’. I recommend Ghostwriter because it’s flexible and can do a lot of the heavy lifting for us.
You can get it for Windows and Linux here.
Many Mac users use Sublime Text although that’s not free. I used Notepad++ when I used to be on Windows if you don’t like the look of Ghostwriter.
Next you’ll want to grab Pandoc. Pandoc is where the magic happens - it is able to convert documents between a huge number of different file types without any extra work on your end.
You can get it for all platforms here.
Finally, to ensure you have all the components Pandoc needs, you’ll want to install MiKTeX. This lets you render PDFs and the like, and make them look good.
Okay that’s everything. Breathe out.
Write Something!
Open up Ghostwriter and play with the settings. You can change your Font and Themes to get it looking the way you want. This has no impact on the end result, so feel free to make it Papyrus with black-and-pink colouring.
The sidebar of Ghostwriter has a cheat-sheet of all the Markdown syntax. Instead of pressing Crtl-i to turn on italics, you wrap the text you want to be in italics in a *.
 Here’s that sentence but how it appears in my editor!
The same applies for bold.
Some elements only need to go before the text you want to style - like
headers
smaller headers
you get the picture
- and
- bullet
- points
Links and images look more intimating, but they’re fine once you get used to them. The big trick to remember is how you reference images - you can reference things which are online (via a URL) or stored on your computer - make sure you get the path right! These are only used when the markdown file is converted - the image is the saved into your output.
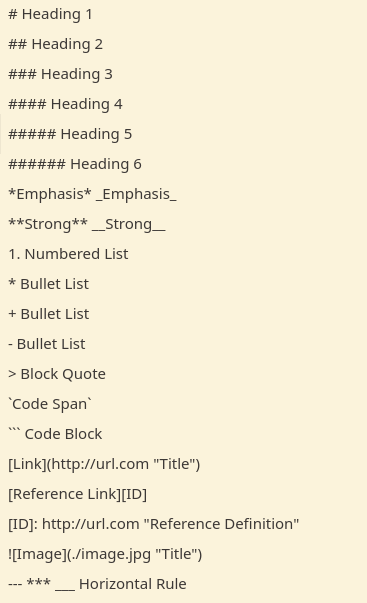
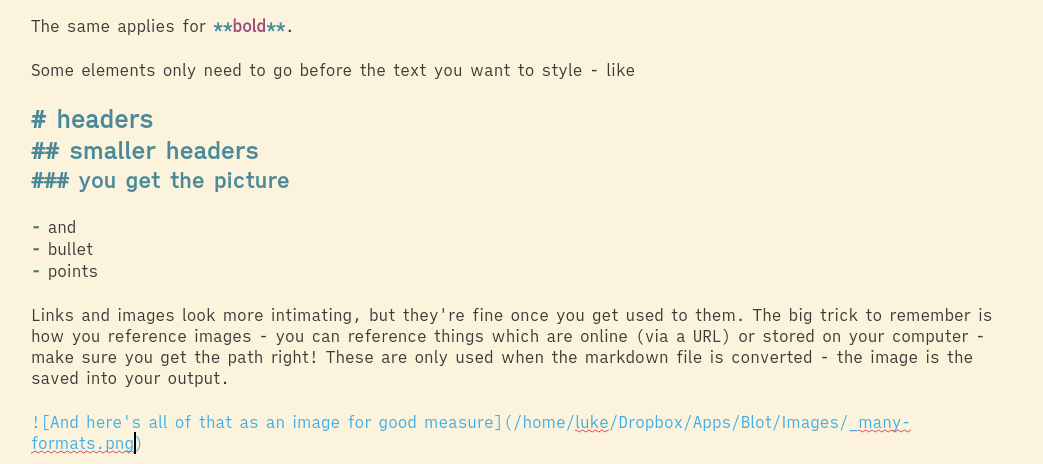 And here’s all of that as an image for good measure
Now to get really weird visually, you can use the Preview button in the bottom right to get a preview of how your markdown will render (mostly - more on that later). You’ll notice it duplicates your Font and Theme - this is slightly deceptive, and I wish it didn’t do that!
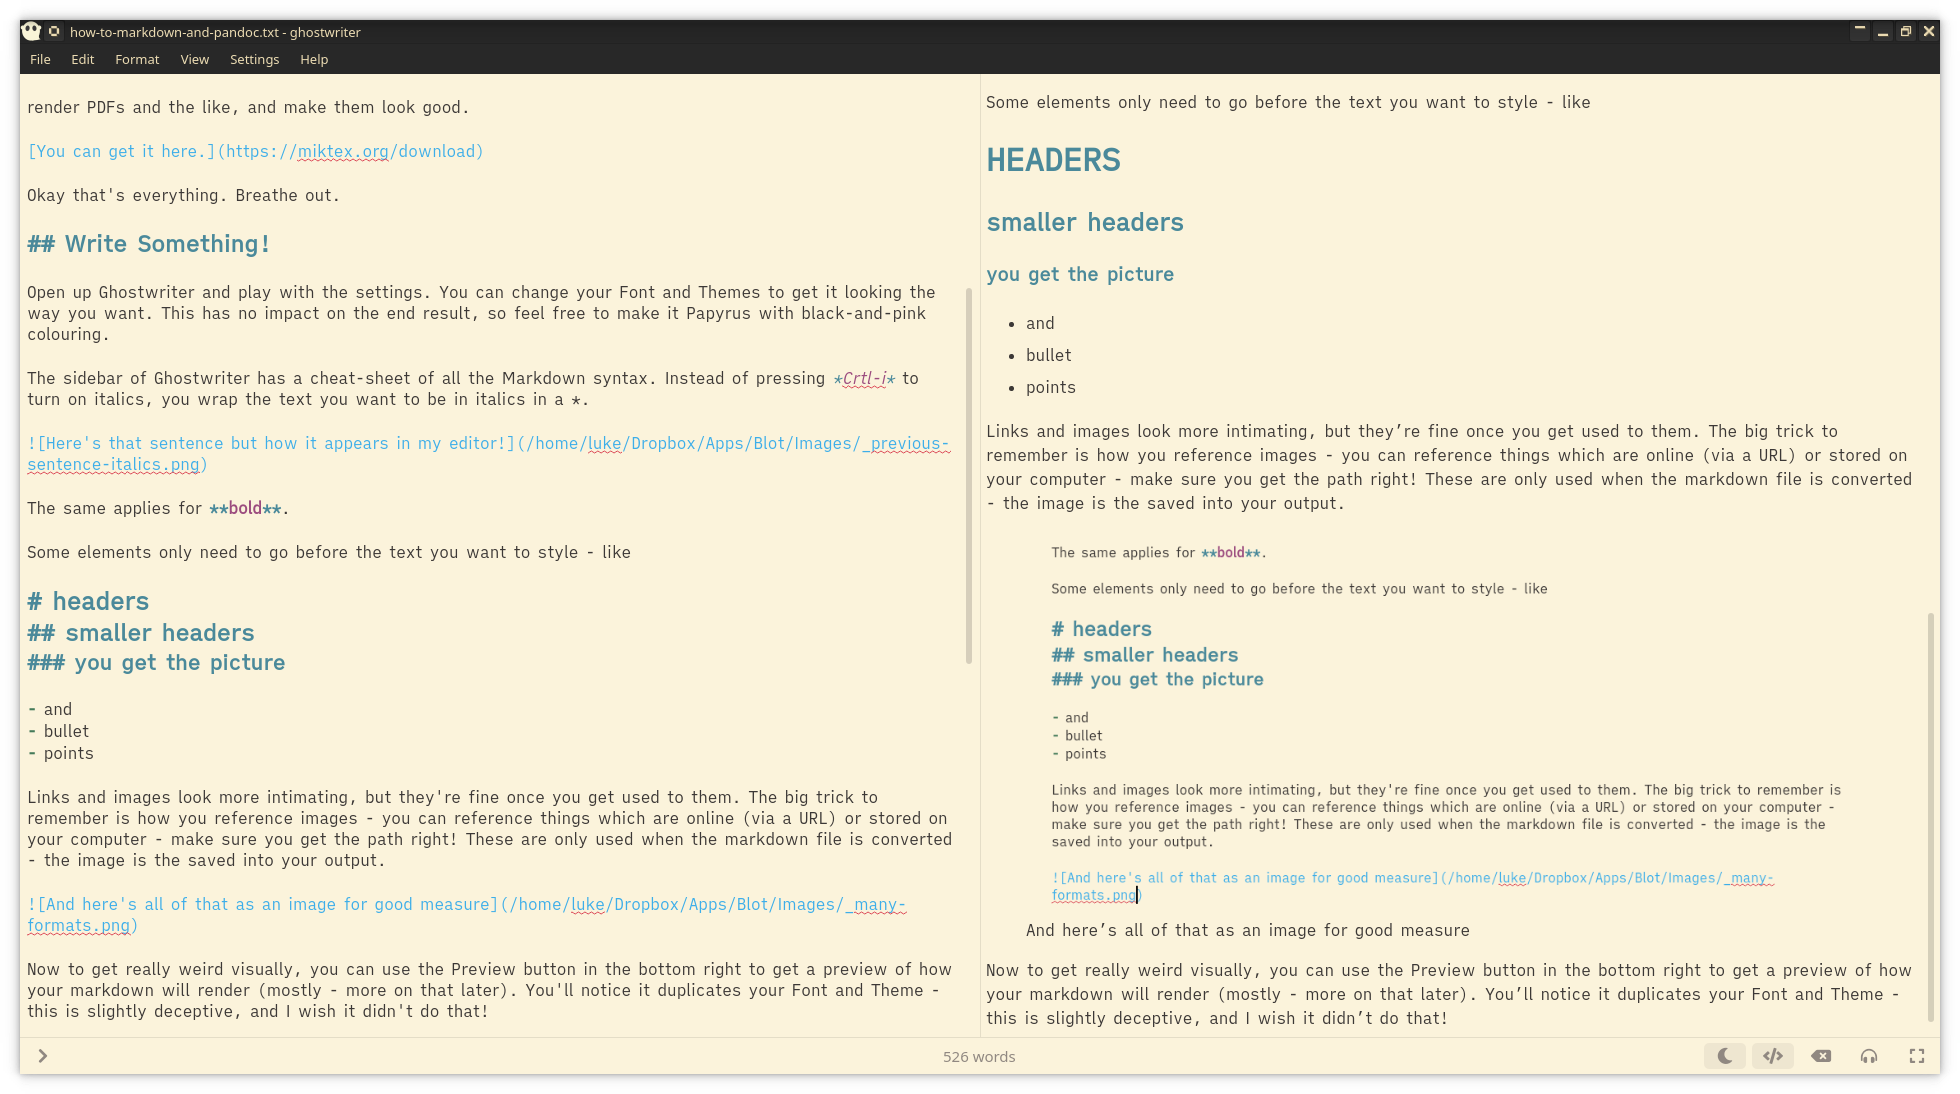 The preview itself
Please Read This Part
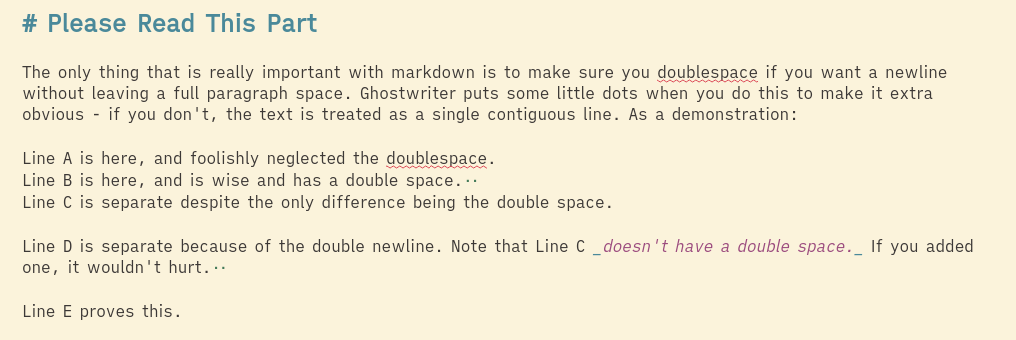
The only thing that is really important with markdown is to make sure you doublespace if you want a newline without leaving a full paragraph space. Ghostwriter puts some little dots when you do this to make it extra obvious - if you don’t, the text is treated as a single contiguous line. As a demonstration:
Line A is here, and foolishly neglected the doublespace. Line B is here, and is wise and has a double space.
Line C is separate despite the only difference being the double space.
Line D is separate because of the double newline. Note that Line C doesn’t have a double space. If you added one, it wouldn’t hurt.
Line E proves this.
 See?
See?
Tables
Tables get their own sub-heading because they come up a lot and are a little less elegant than anything else. You effectively construct a table out | and - characters. This can take a lot of time - a lot of people use this instead.
If you want to be awful like me instead, you build them like this:
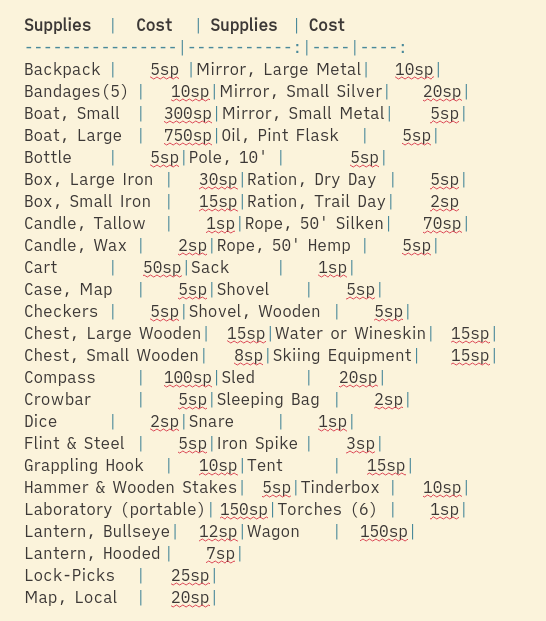 Awful.
Which, when ‘rendered’ (turned into an output file) looks like this:
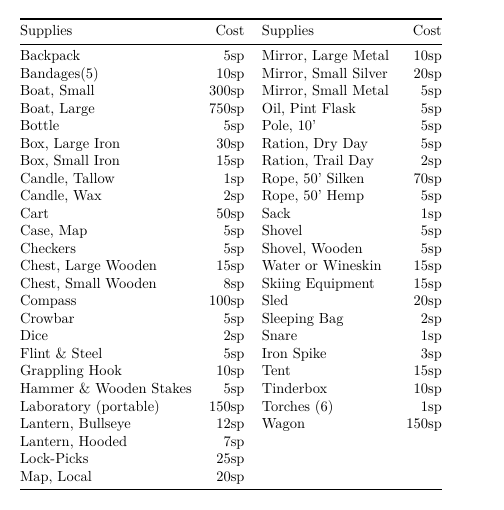 Nice!
Nice!
Output
Save your hard work - either as a .txt or a .md, it doesn’t much matter.
Okay now the part that looks scary but isn’t.
Press Windows + R - this brings up the run menu. Type in cmd and hit enter. This black box is your console or terminal or whatever you want to call it.
Now you have to change directory (folder) to where you saved you .md or .txt. To change your directory you use the cd command. To make this easier, you want to move one directory at a time - the computer can only ‘see’ folders inside your current folder. For me, this was just
cd Documents
but might be longer for you. If you go wrong, type
cd ..
to go ‘up’ a directory. You can’t break anything by moving around folders, so don’t worry.
Once you’re in the directory with your .md or .txt file, it’s time for the big one - typing out the command.
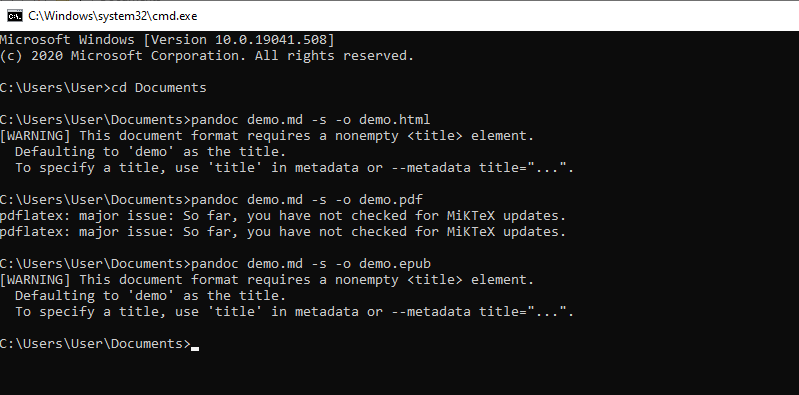 Dark magic? I don’t think so.
One by one, type the following in:
pandoc yourfile.md -s -o outputfile.pdf
pandoc yourfile.md -s -o outputfile.html
pandoc yourfile.md -s -o outputfile.epub
You can and should change the name of outputfile to whatever you like.
You can do these in any order - you might get a lot of prompts asking you to install additional packages the first time you do this, but that’s okay - just hit ‘Install’ and wait.

Look upon your works and despair - you just did computer stuff you big nerd.
If anyone has any issues with aspects of this guide please let me know via Twitter DM. I do ask you restart your computer and try again before contacting me as Pandoc can be temperamental when first installed.
At some point in the future I’ll write up my little list of useful LaTeX you can drop straight into markdown to make slightly nicer PDFs but I’m done for now. These are very powerful tools and you can do a lot more with them but this is the basics.